

You can have noticed the celebrity trend du jour: the hourglass waists of girls wearing so-called waist trainers. This tummy tuck shapewear conjures up images of buttoned corsets and overly tight waists from a dim past. But does it live as much as the hype?
Splashy ads suggest these compression devices can aid you shave inches off your waist by wearing them during exercise or as a part of a day by day routine. But the claims aren't supported by much of the evidence, says physical therapist Michael Clem of the Spaulding Rehabilitation Network.
“People want a quick fix,” says Clem. What is one other thing? Diet and exercise take longer and require more dramatic habit changes. We all know what we want to do, we just don't. need to.”
Dispelling the hour-long hype
Claim breaks down 4 common claims made about waist trainers – and points out one case where they might be useful.
- Reducing fat spots: It's a misconception to compress fat with a waist trainer and expect it to remain put after the shapewear is removed. “Fat is a systemic deposit,” says Clem. “Putting something around your waist isn't going to help you burn fat just in that area.”
- Sweat Inches: Likewise, sweating more in a single area of the body — on this case, under your waist trainer — won't melt fat there. “Sweating is the body's way of cooling down. When we sweat, we expend calories, but we can't say that those calories will come from where we sweat,” Klemm notes.
- Eat less because of stomach pressure: While orthopedic braces or compression sleeves may increase awareness of a body part, causing the wearer to act otherwise, the identical might not be said of a thick band across the abdomen. Our awareness of internal organs will not be that strong, says Clem. And while waist trainers put pressure on the stomach, they probably won't change the sensation of fullness.
- Build a powerful core: Wearing a waist trainer may also help if a physician recommends temporary use after certain surgeries — similar to when someone is rebuilding the core muscles after a cesarean section, hernia surgery, or appendectomy — for the abdominal muscles. By offering tangible “feedback” on use as an individual recovers. “But there are much better ways to teach someone their core awareness,” says Klemm, including working with a physical therapist on posture and respiration.
In most cases, there’s probably no harm in trying certainly one of the shapeshifting devices, although anyone who’s pregnant shouldn’t use them. And if you may have any health issues, it's best to check with your doctor about whether compressing your core could have any negative effects, including not having the ability to breathe deeply and comfortably.

Want to shape your waistline? Try core strengthening exercises.
Listed from least to most difficult, listed below are three of the perfect exercises to strengthen the core muscles that help define the back. Start with one set and work on listening to your form.
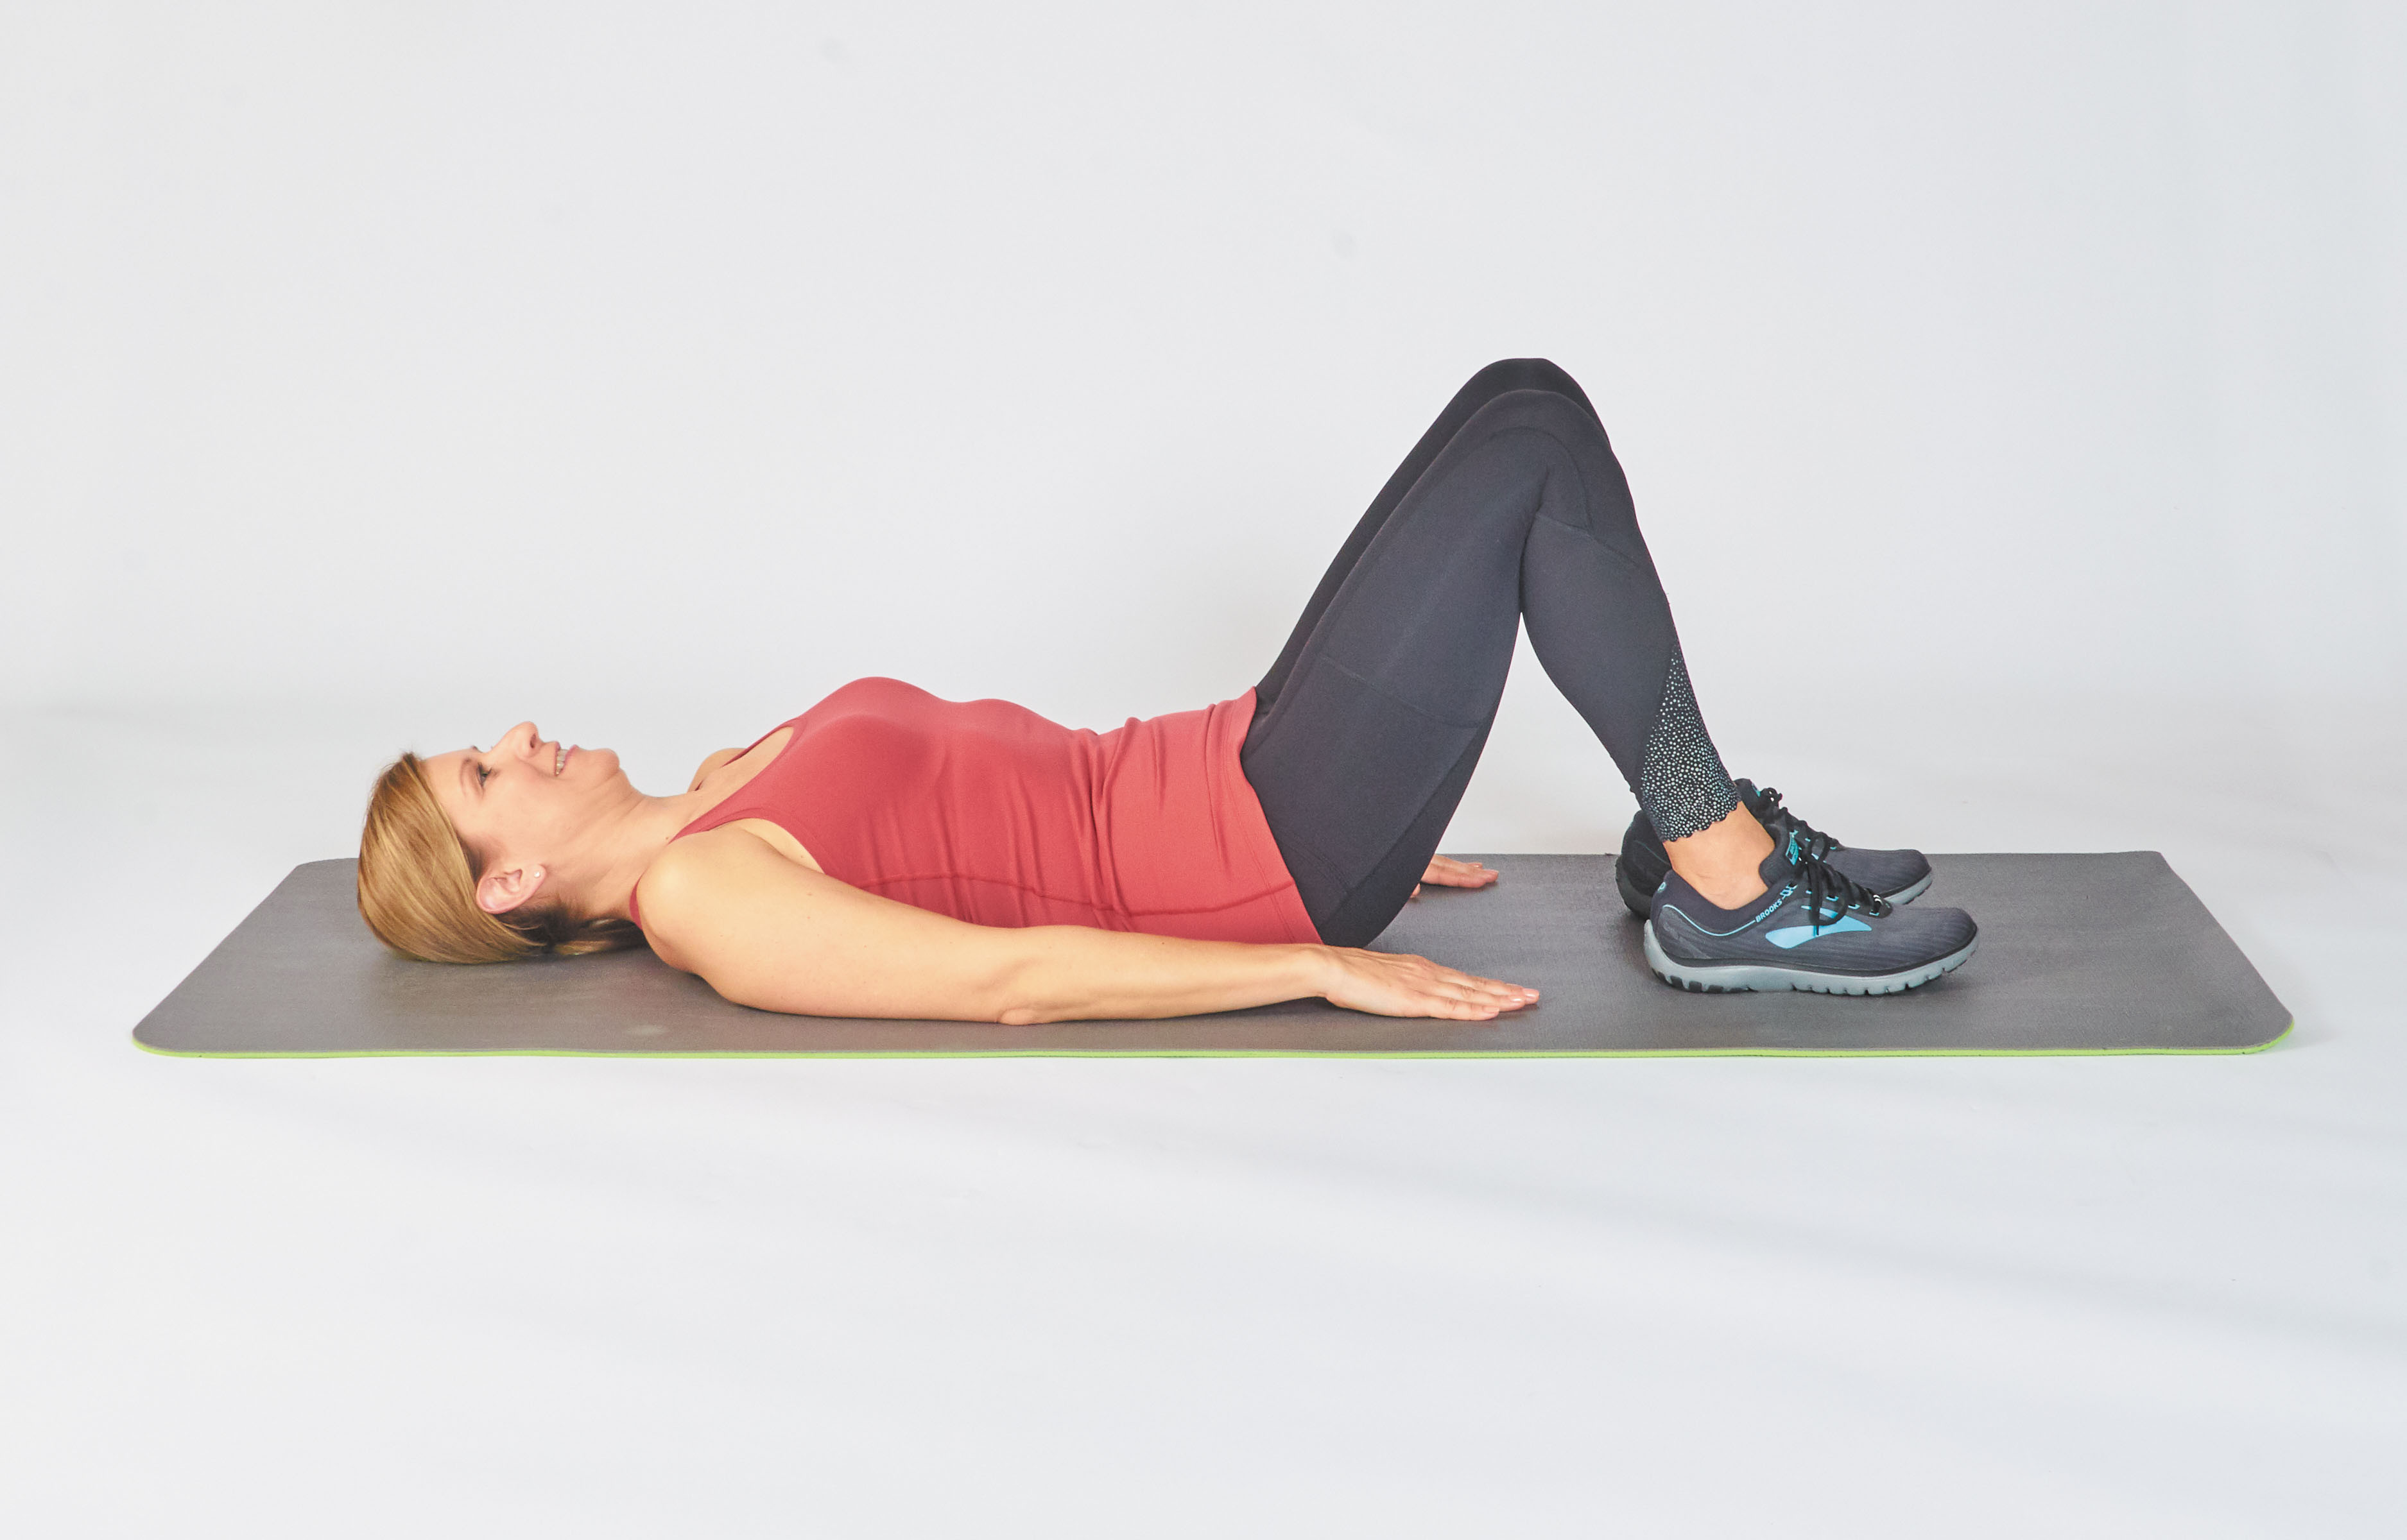
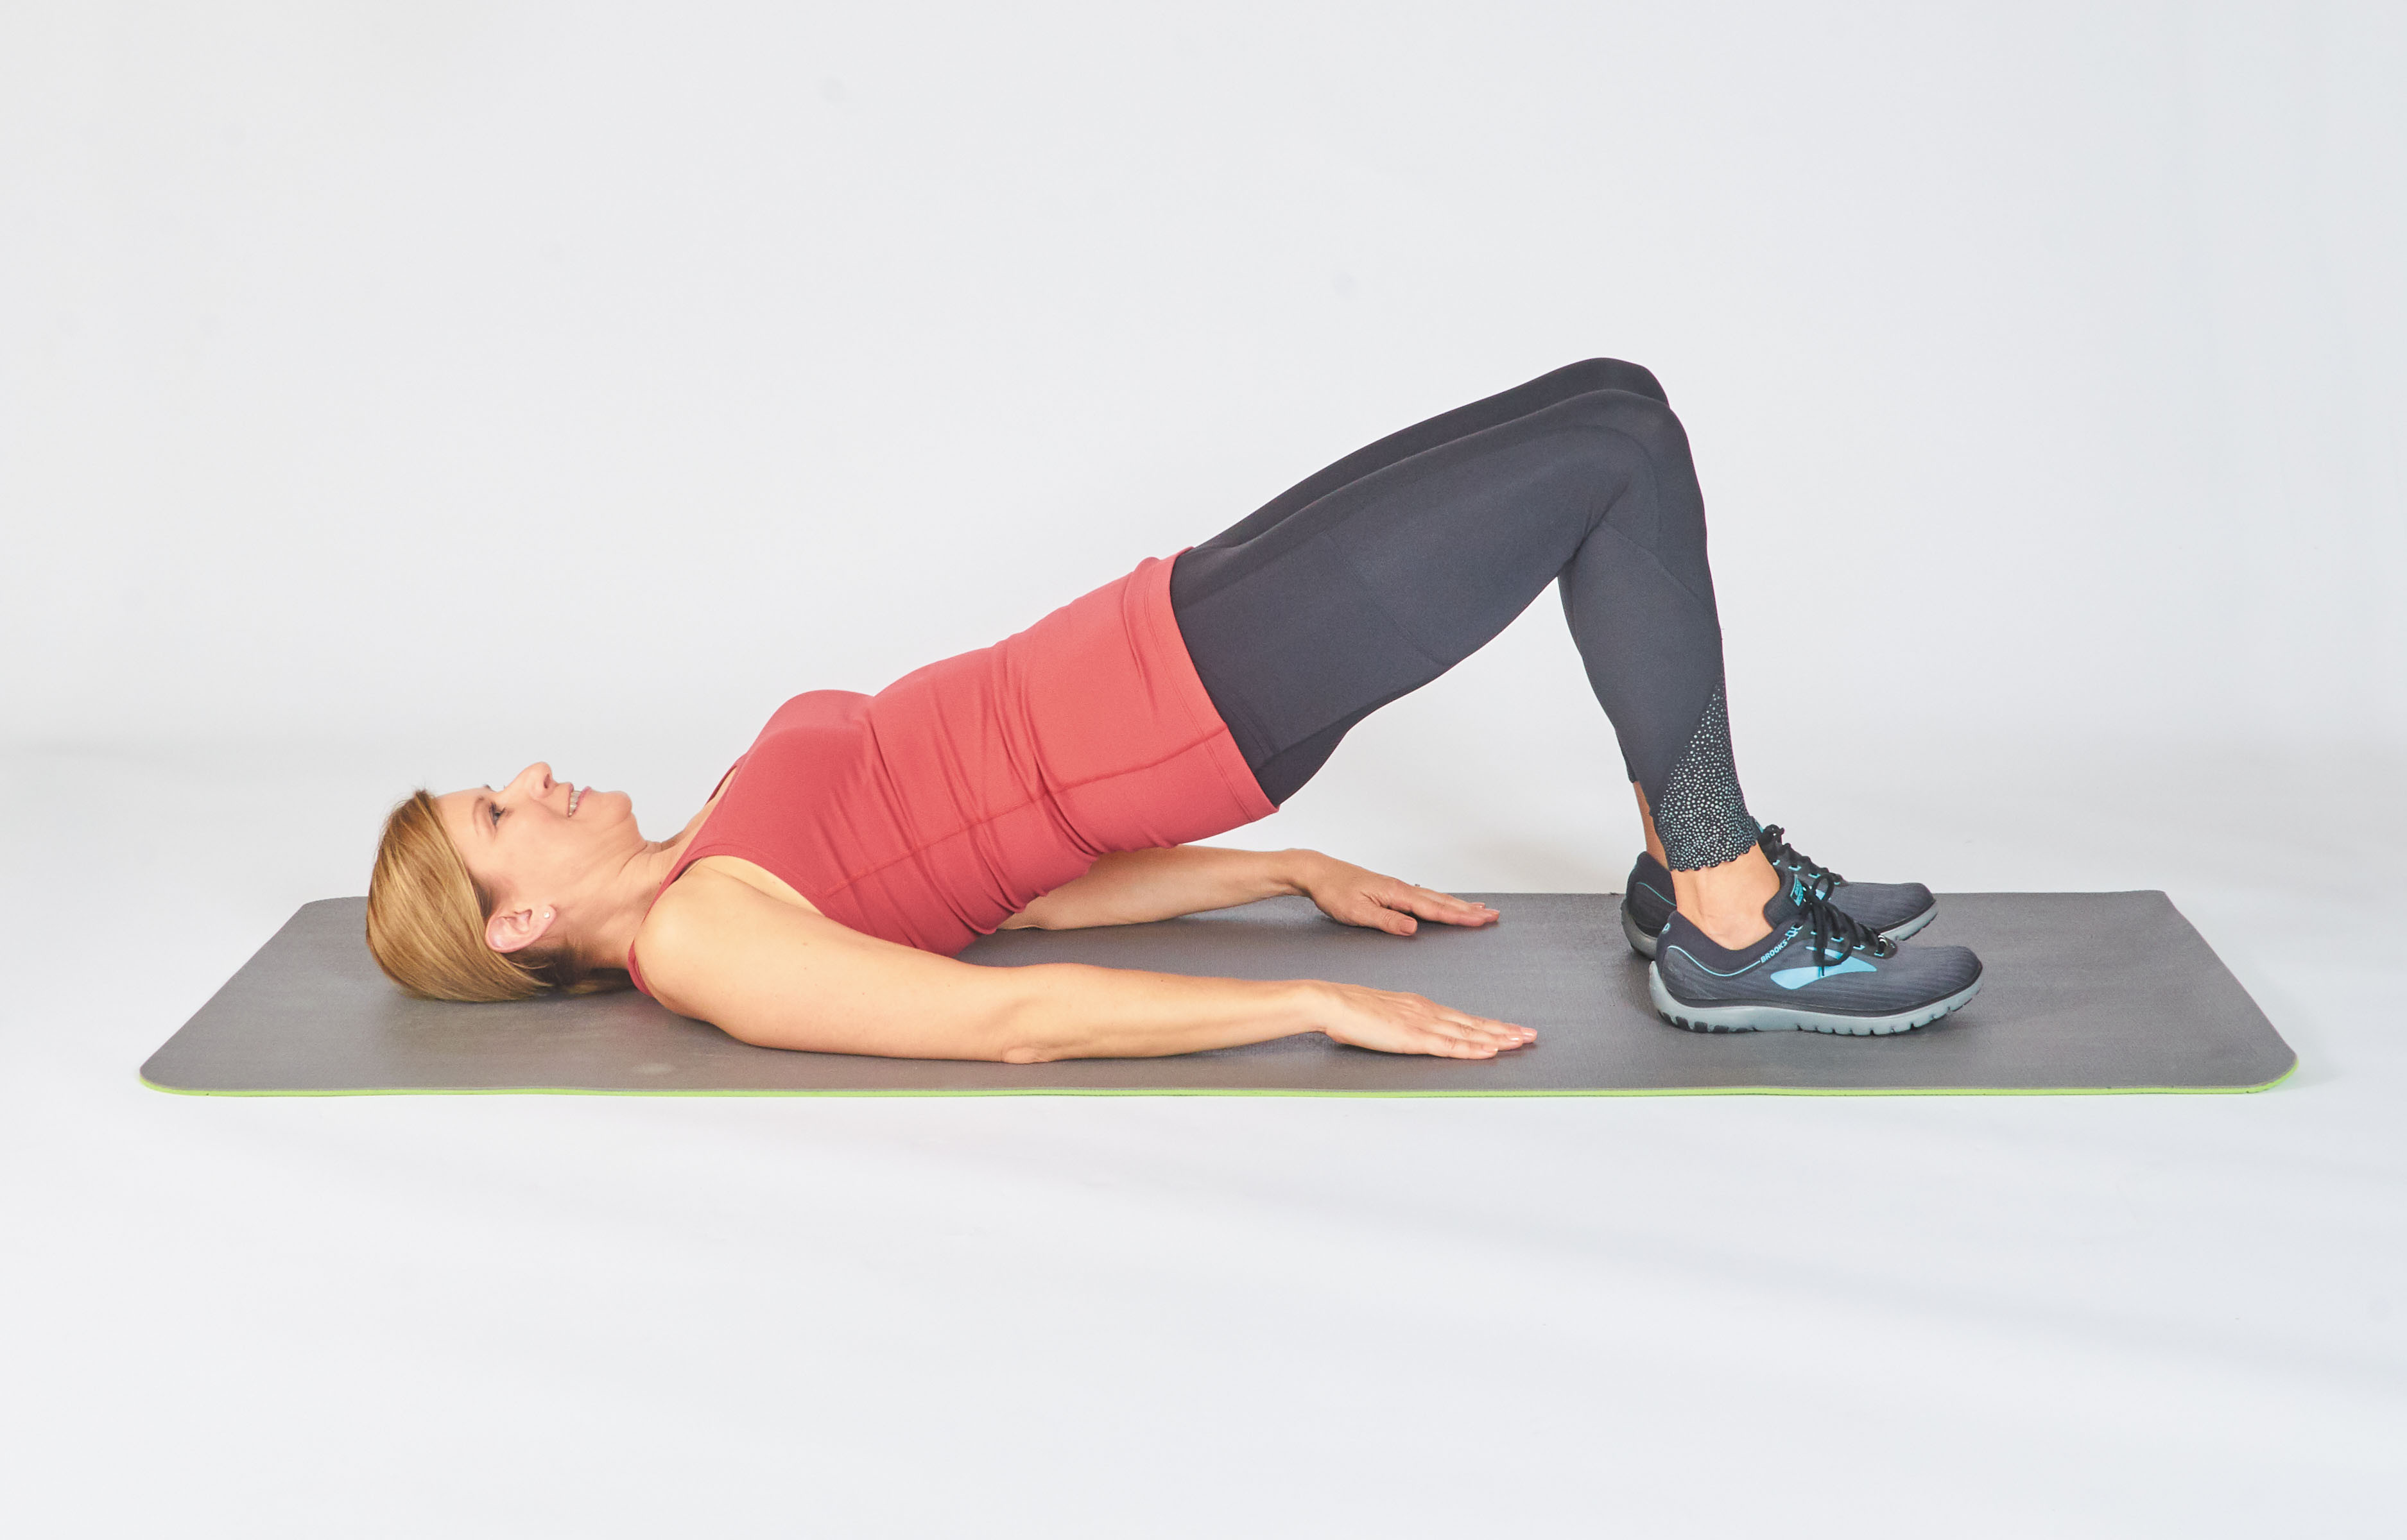
Bridge
Reps: 10
set: 1–3
Speed: 3–1–3
comfort: 30-90 seconds between sets
Starting position: Lie in your back together with your knees bent and feet flat on the ground, hip-width apart. Keep your arms at your sides. Rest your shoulders against the ground.
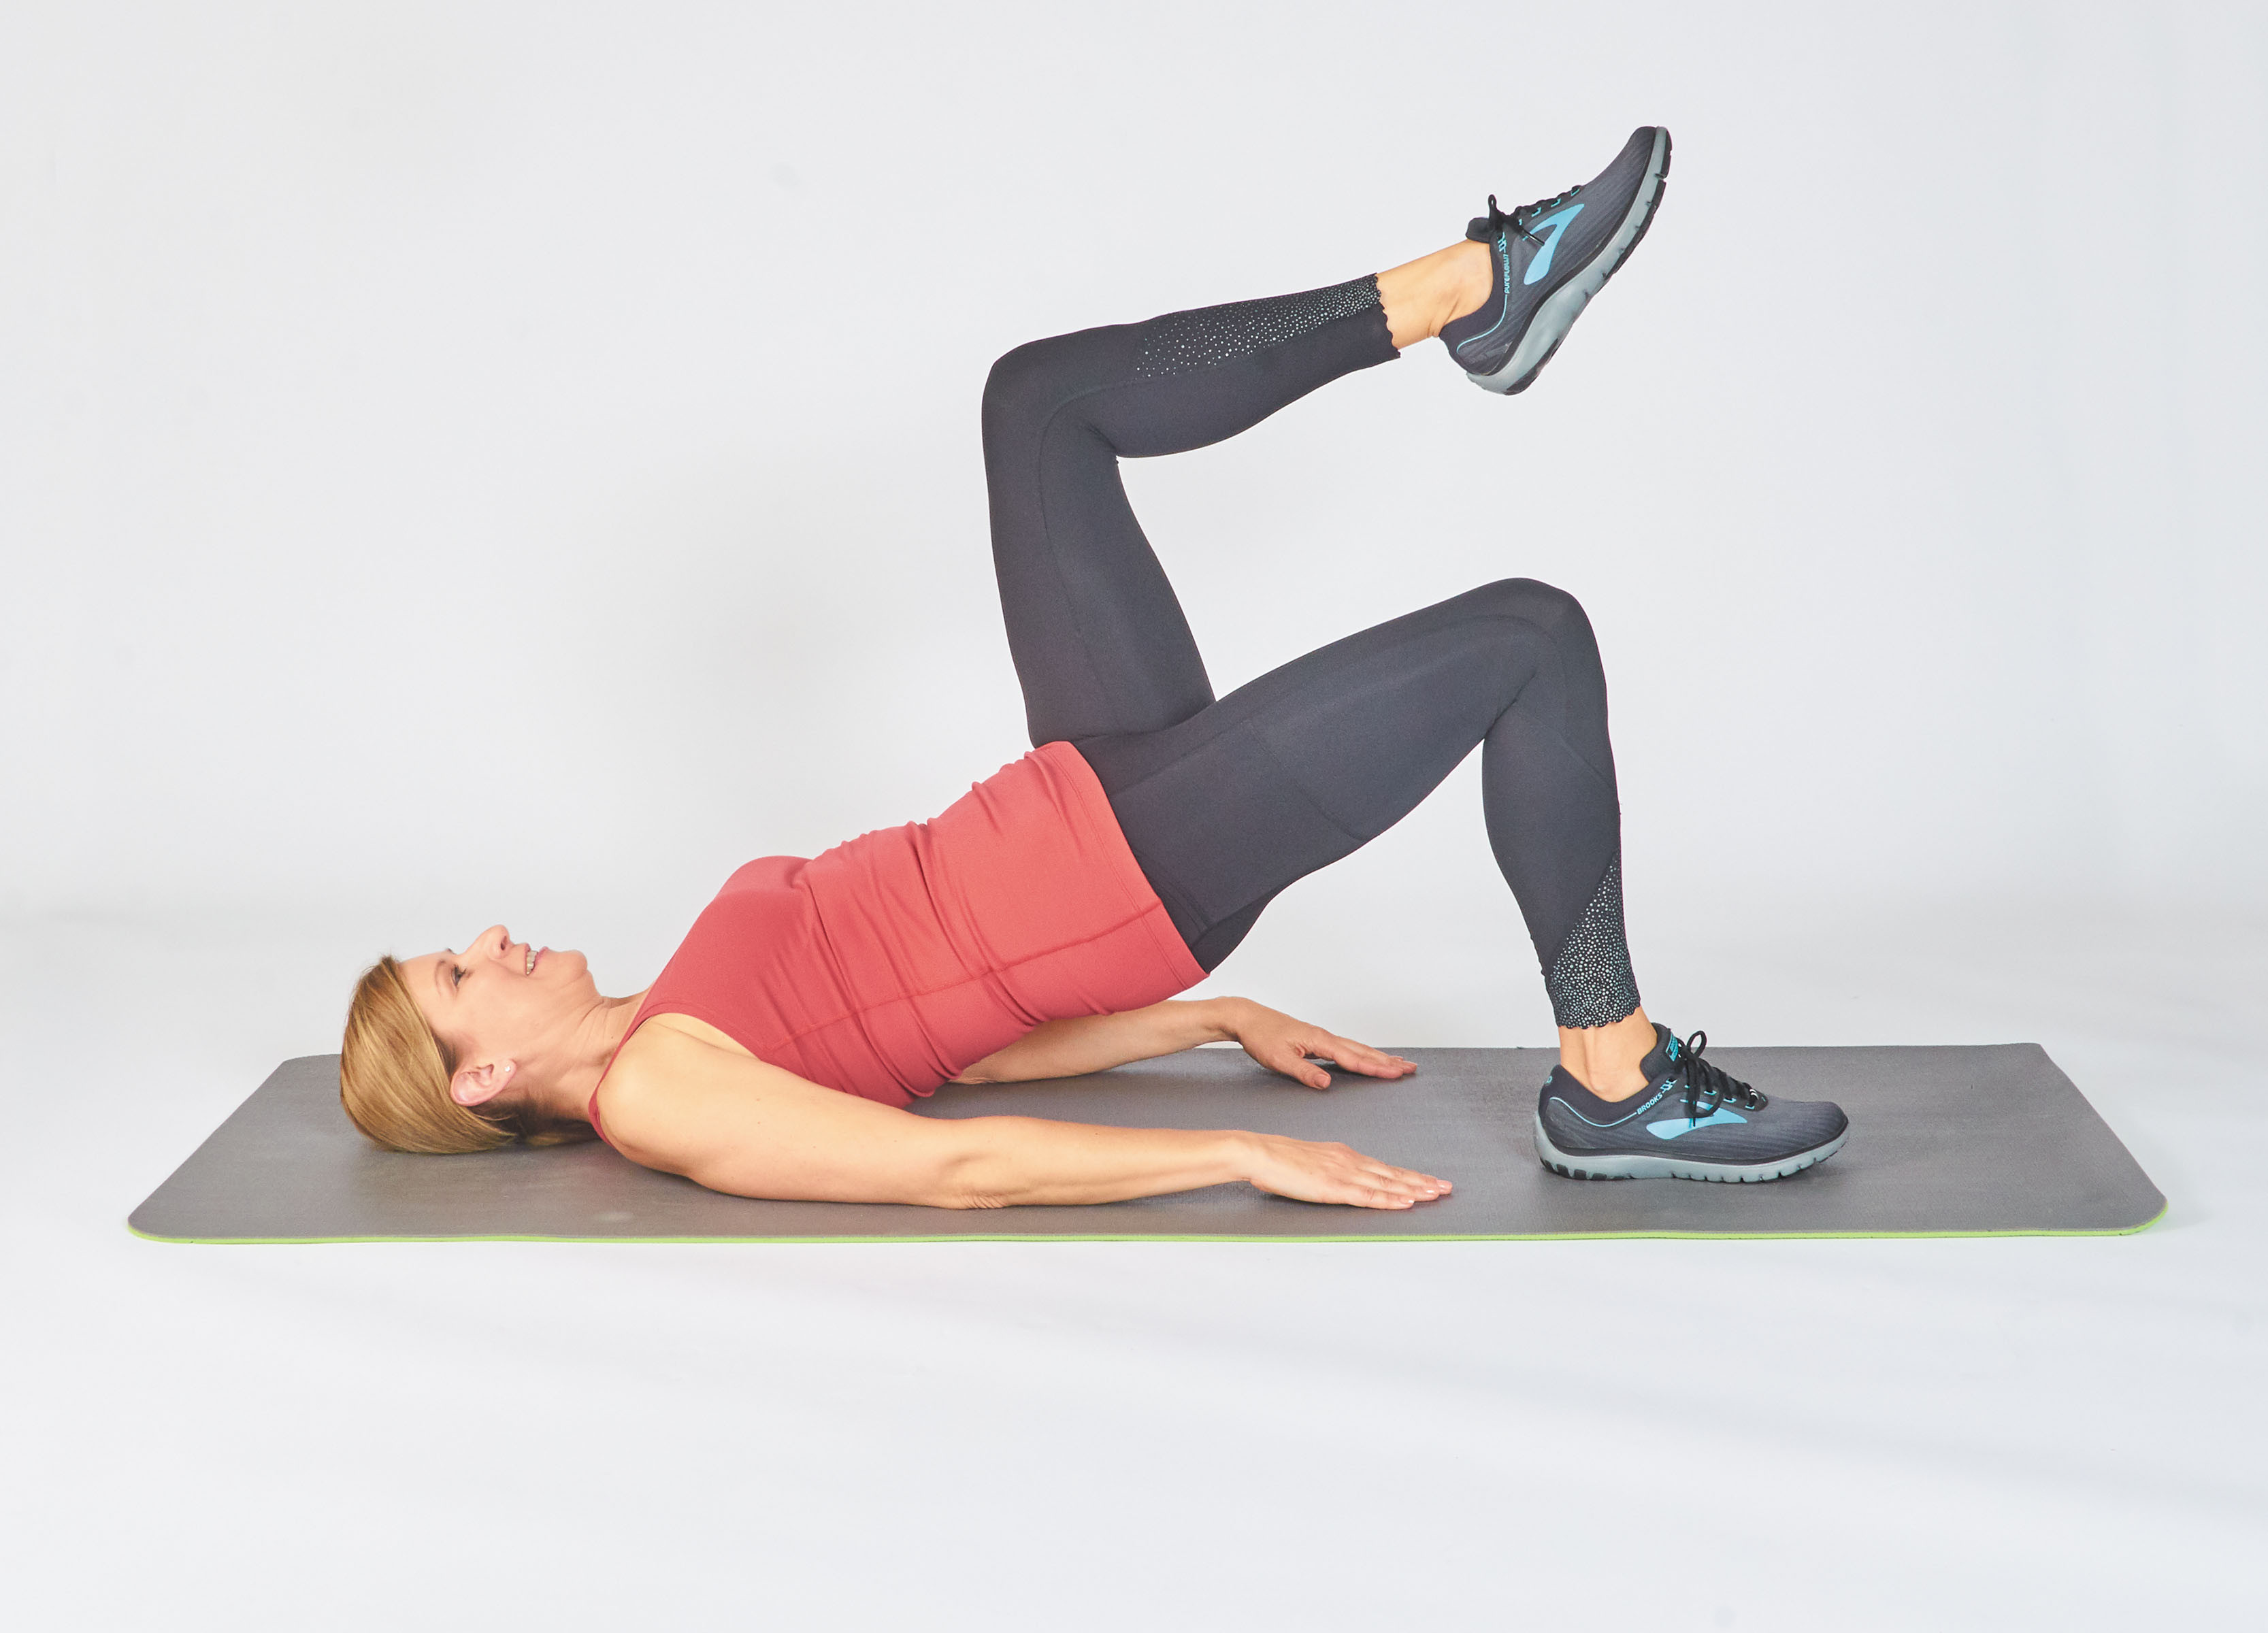
Motion: Tighten your hips, then lift your hips off the ground until they’re in a straight line together with your knees and shoulders. Hold and return to starting position.
Tips and Techniques:
- Tighten your hips before lifting.
- Keep your shoulders, hips, knees and feet evenly aligned.
- Keep your shoulders down and rest on the ground.
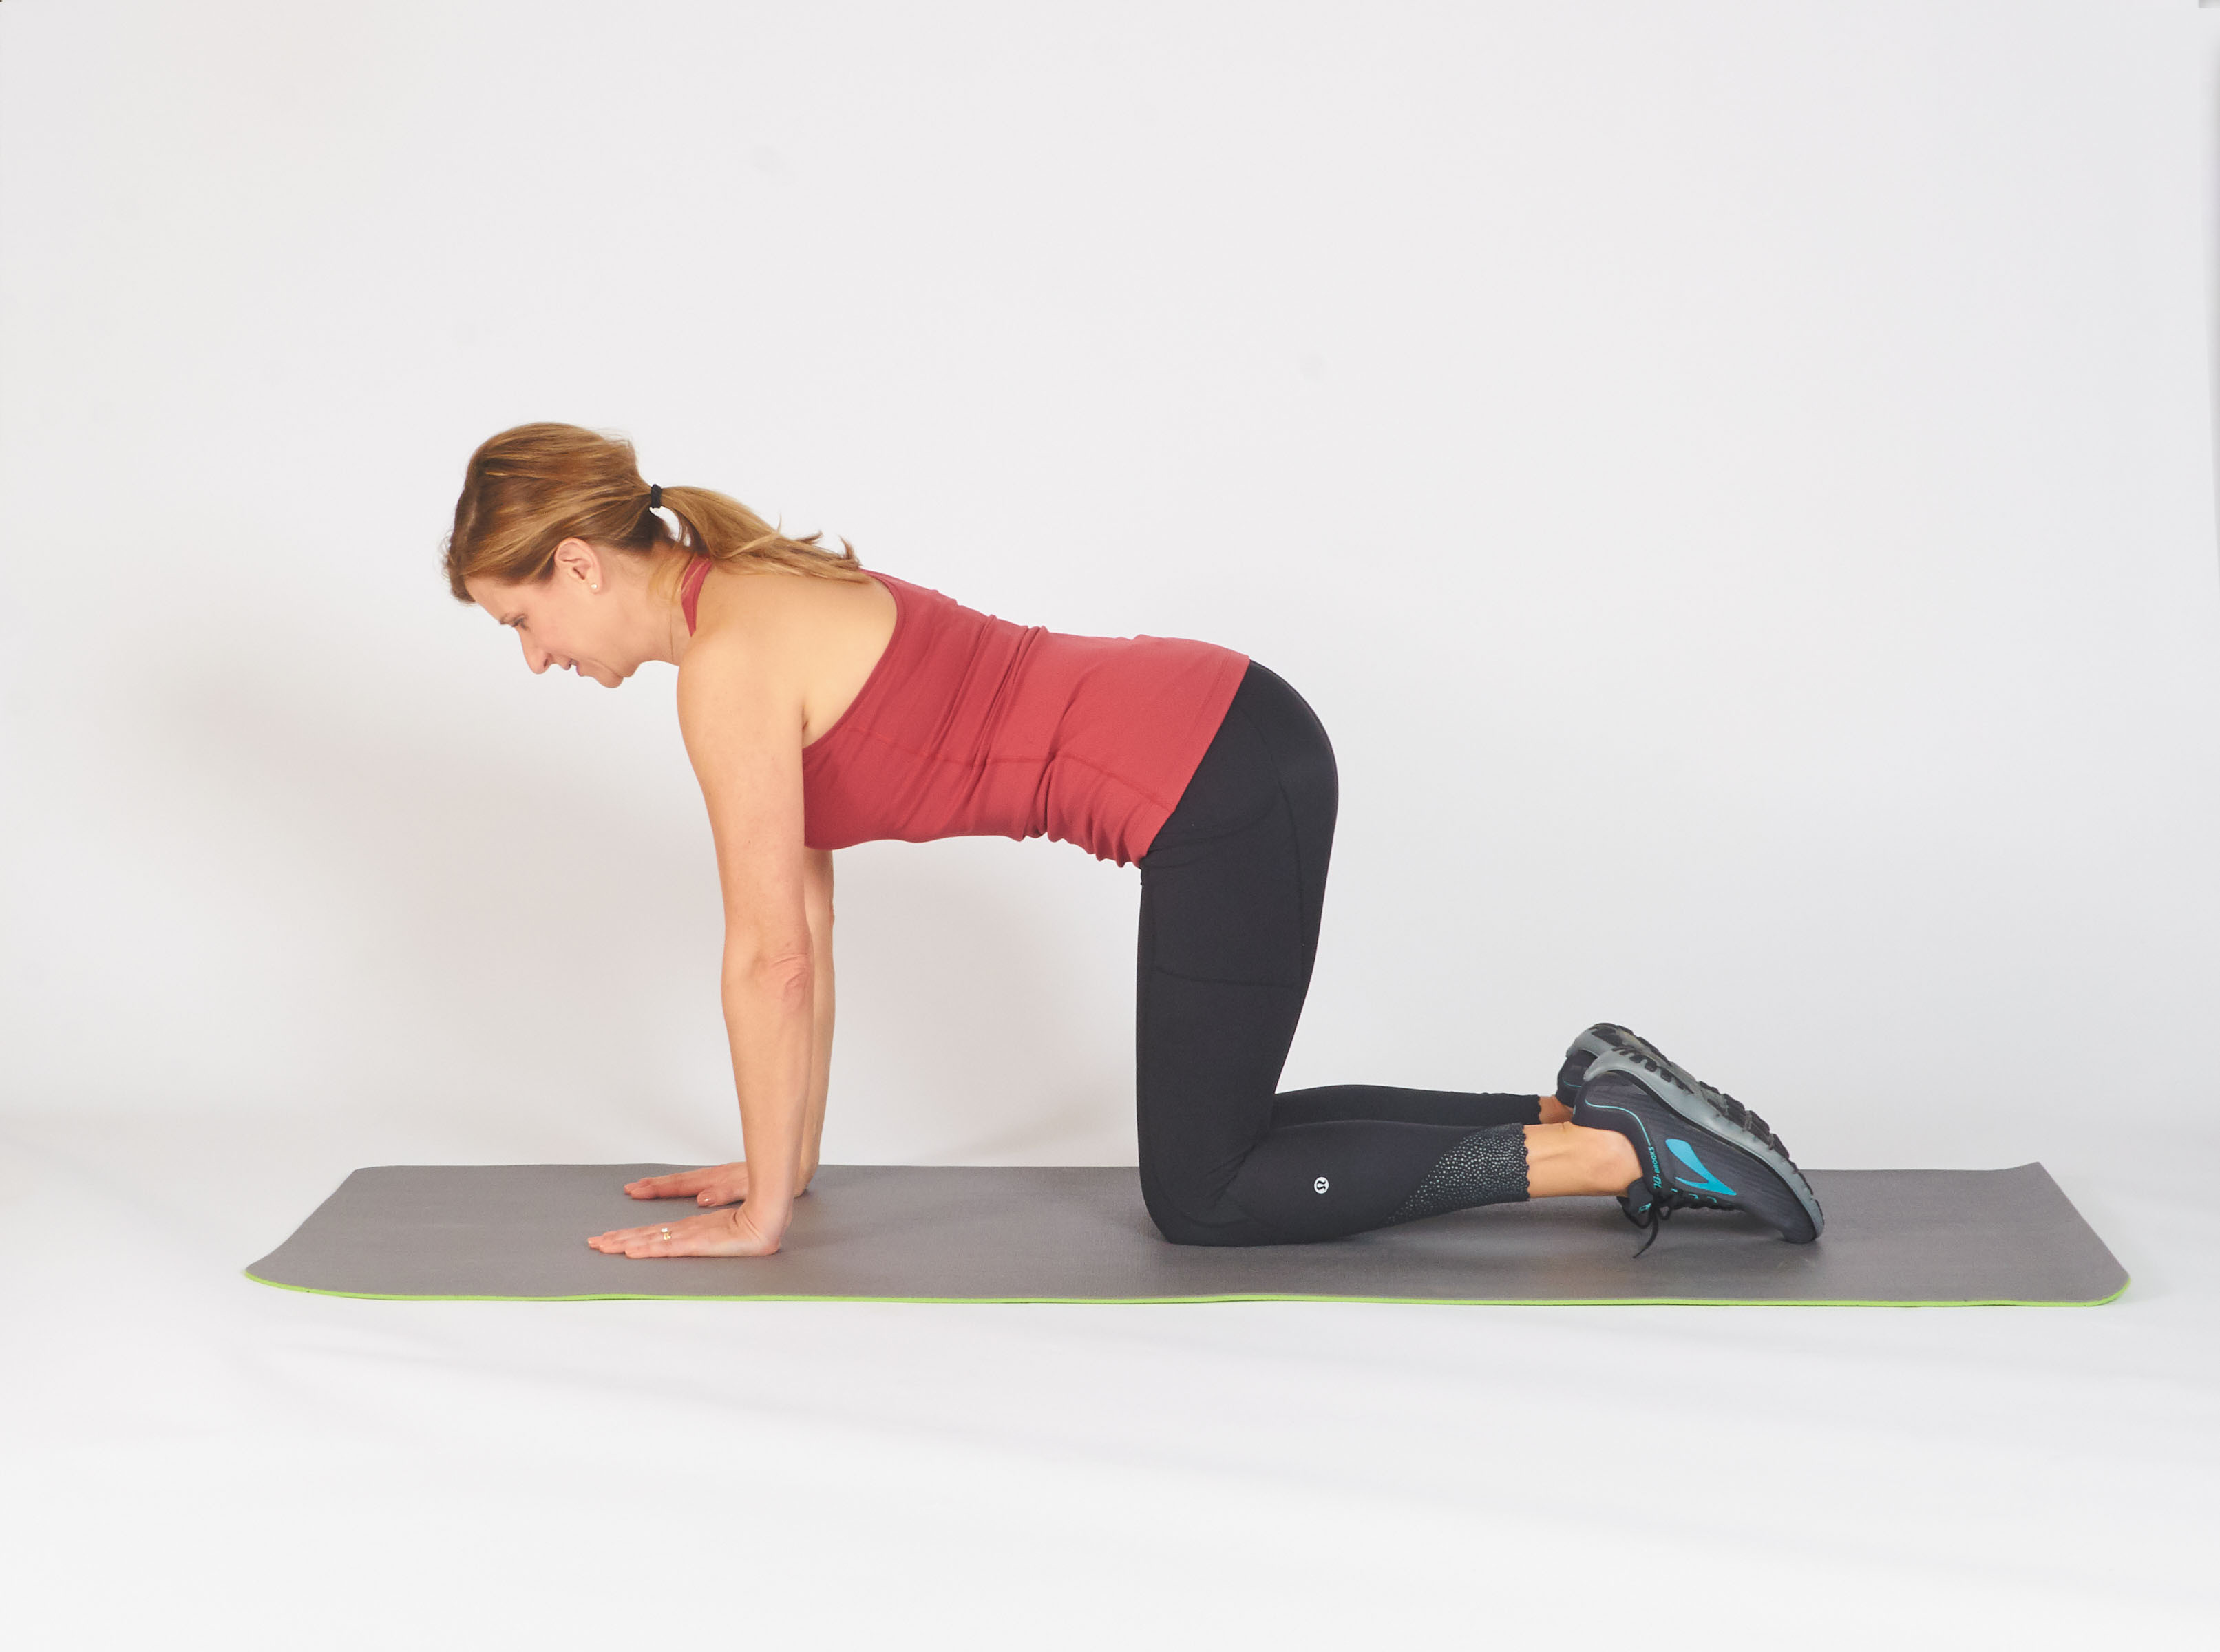
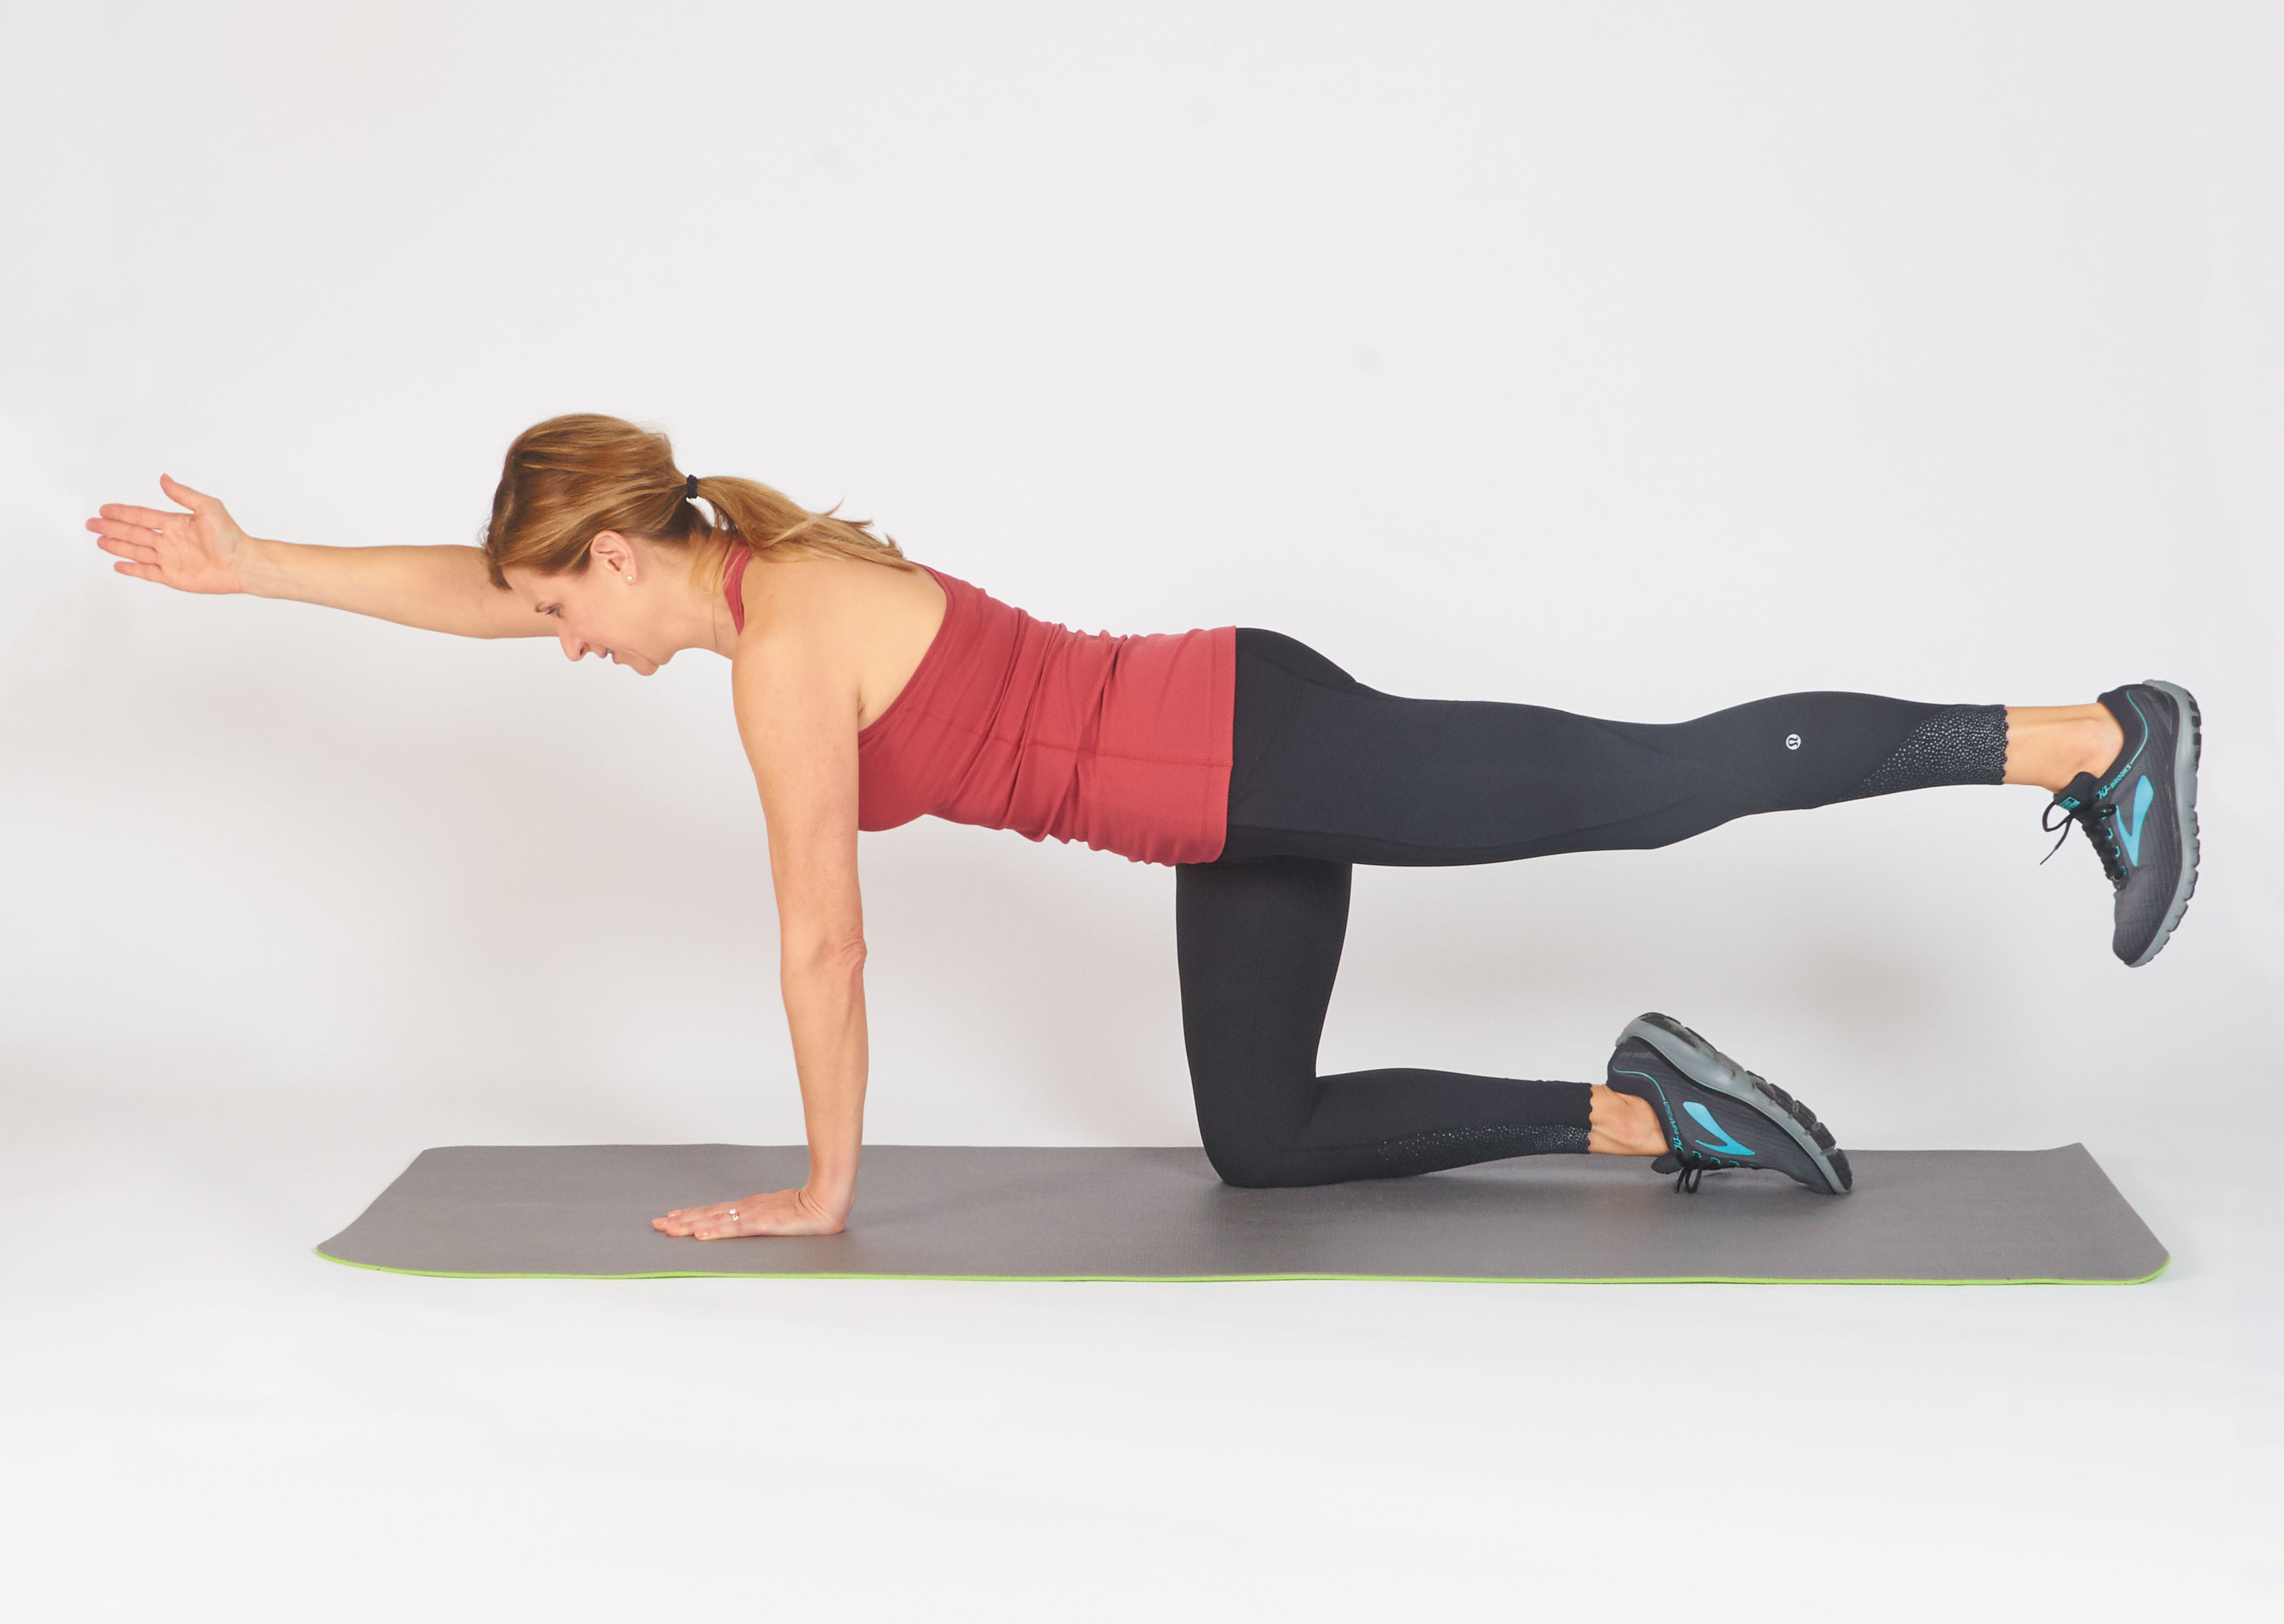
Raise the other arm and leg.

Reps: 10
set: 1–3
Speed: 3–1–3
comfort: 30-90 seconds between sets
Starting position: Kneel on all fours, keeping your hands and knees directly under your shoulders and hips. Keep your head and spine neutral.
Motion: Extend your left leg off the ground behind you while reaching out in front of you together with your right arm. Keeping your hips and shoulders square, attempt to bring that leg and arm parallel to the ground. Hold and return to the starting position, then repeat together with your right leg and left arm. This is a representative.
Tips and Techniques:
- Keep your shoulders and hips square in order that alignment is maintained throughout.
- Keep your head and spine neutral.
- Think of lengthening your torso by stretching your arm and leg in opposite directions.
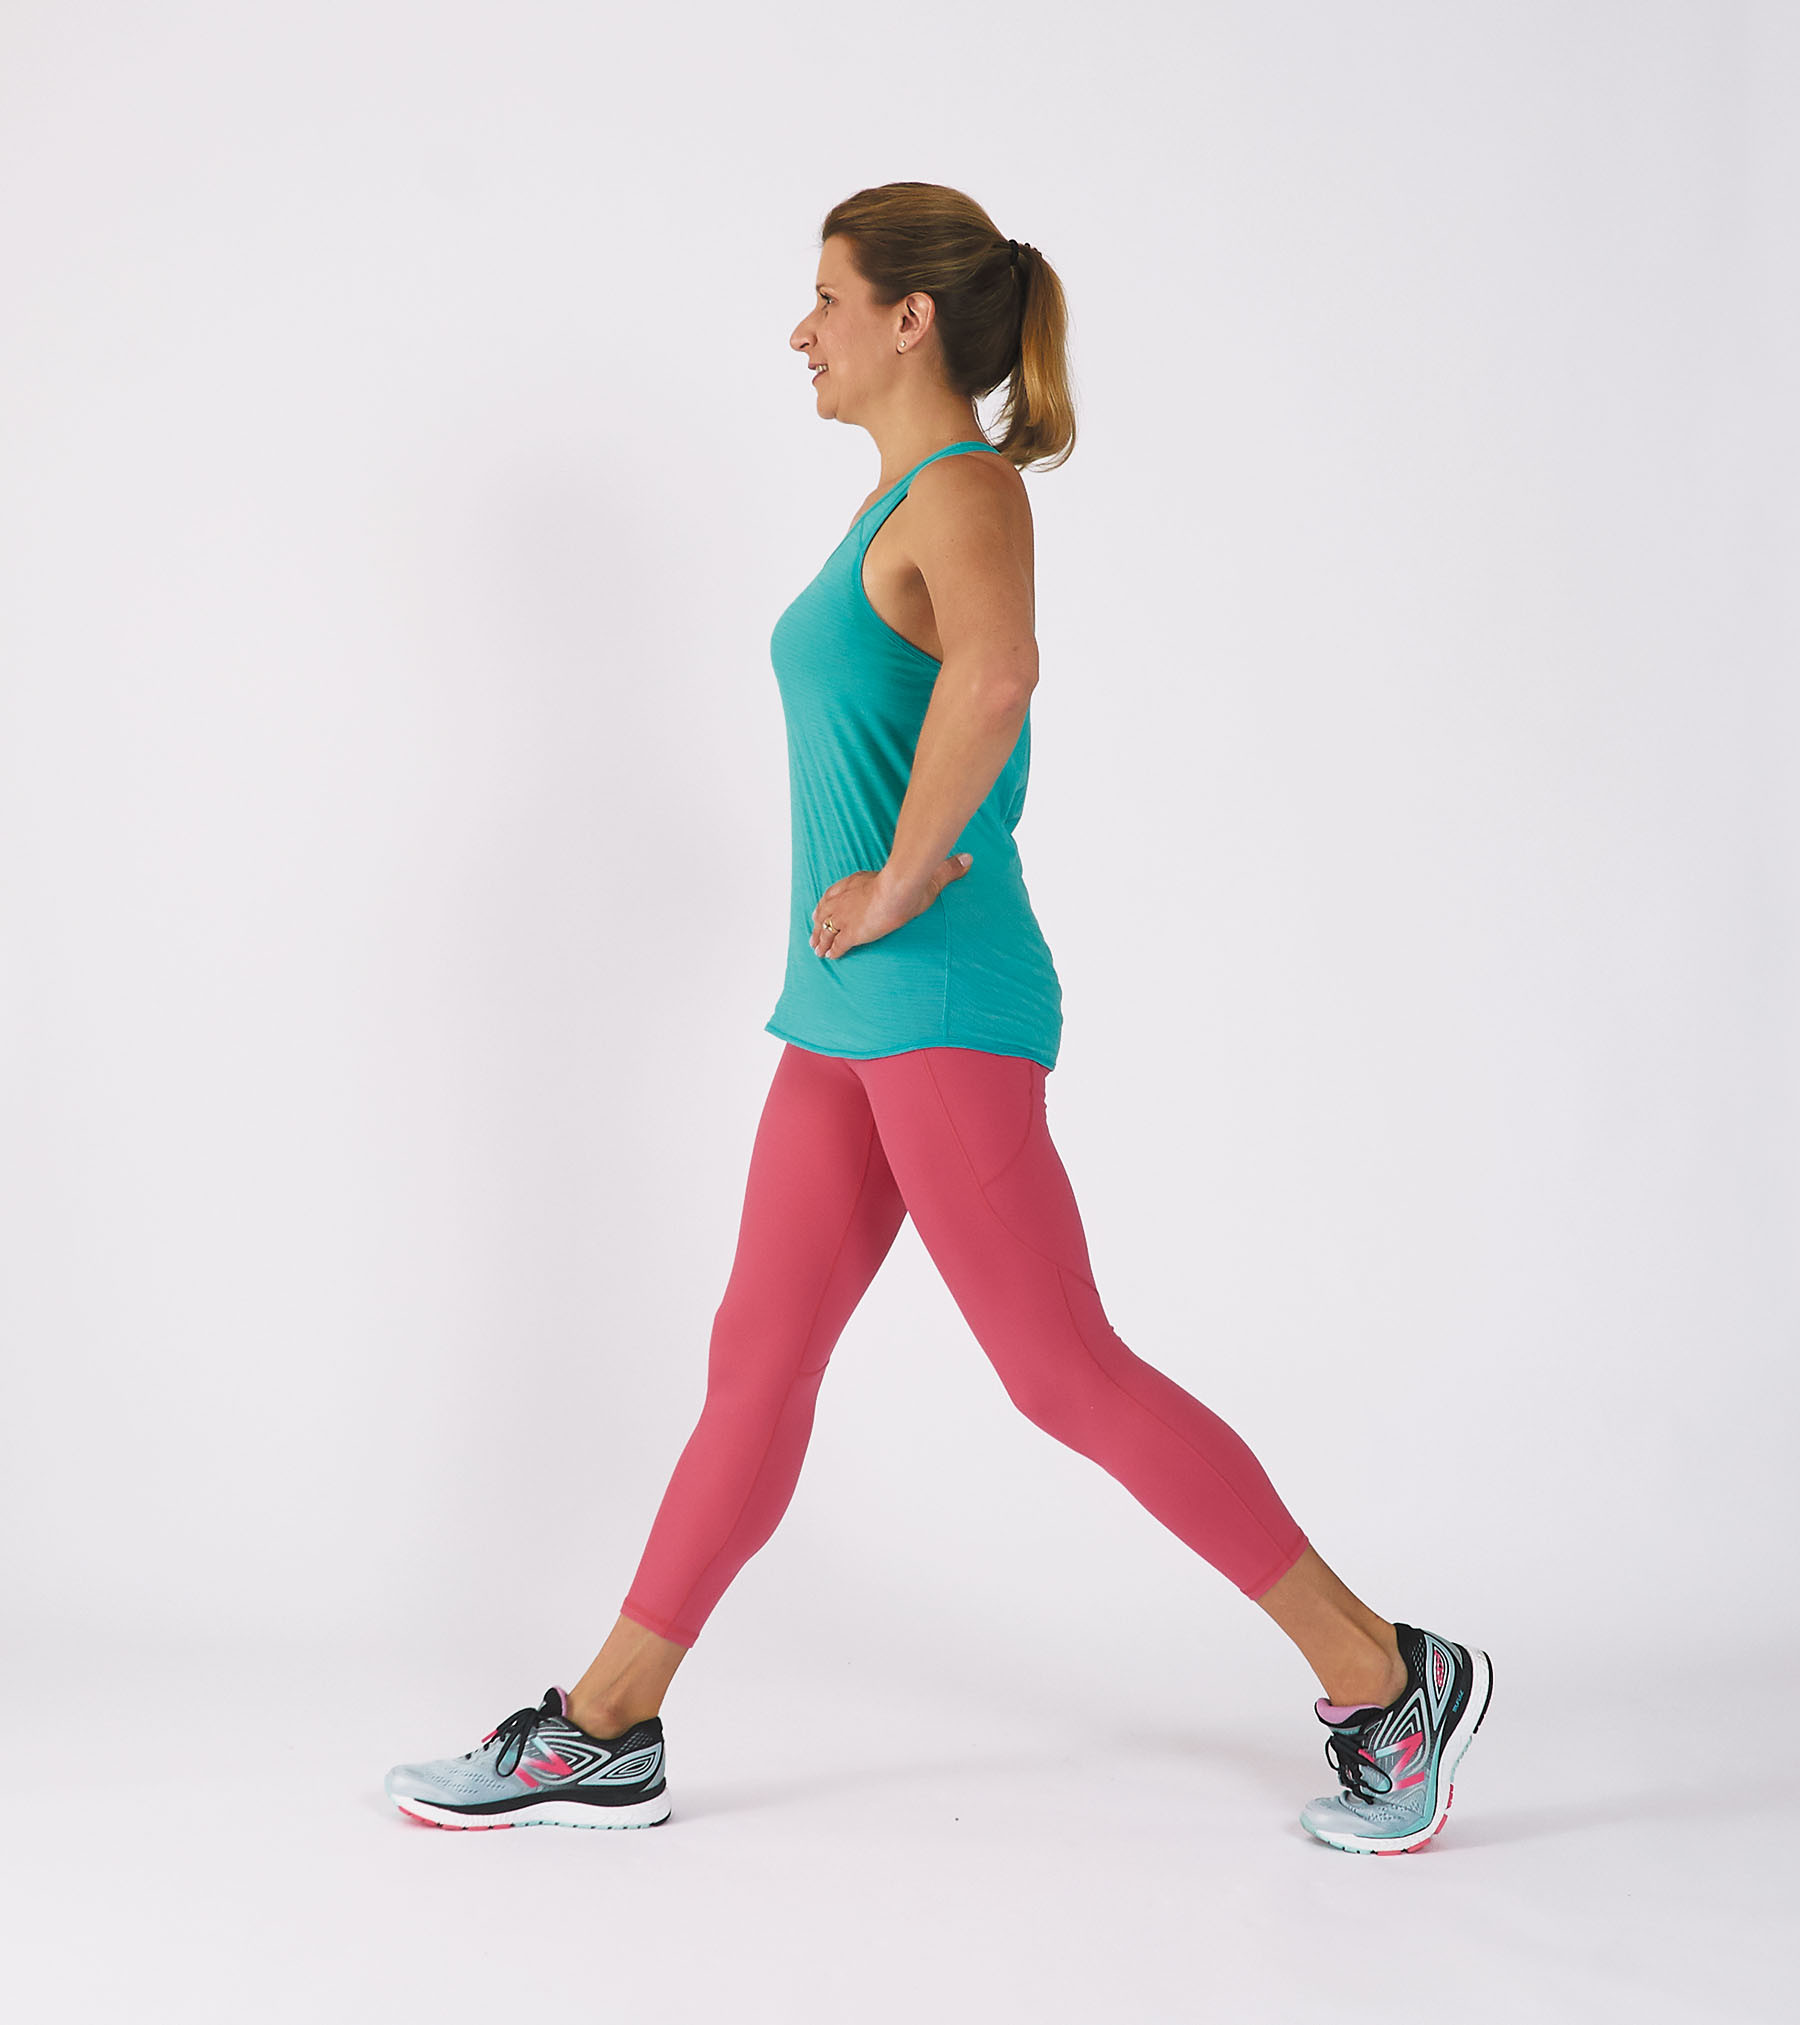
Stationary
broom
Reps: 8-12 per side
set: 1-3
Speed: 3-1-3
comfort: 30-90 seconds between sets
Starting position: Stand straight together with your right foot one to 2 feet in front of your left foot, hands in your hips. Shift your weight forward and lift your left heel off the ground
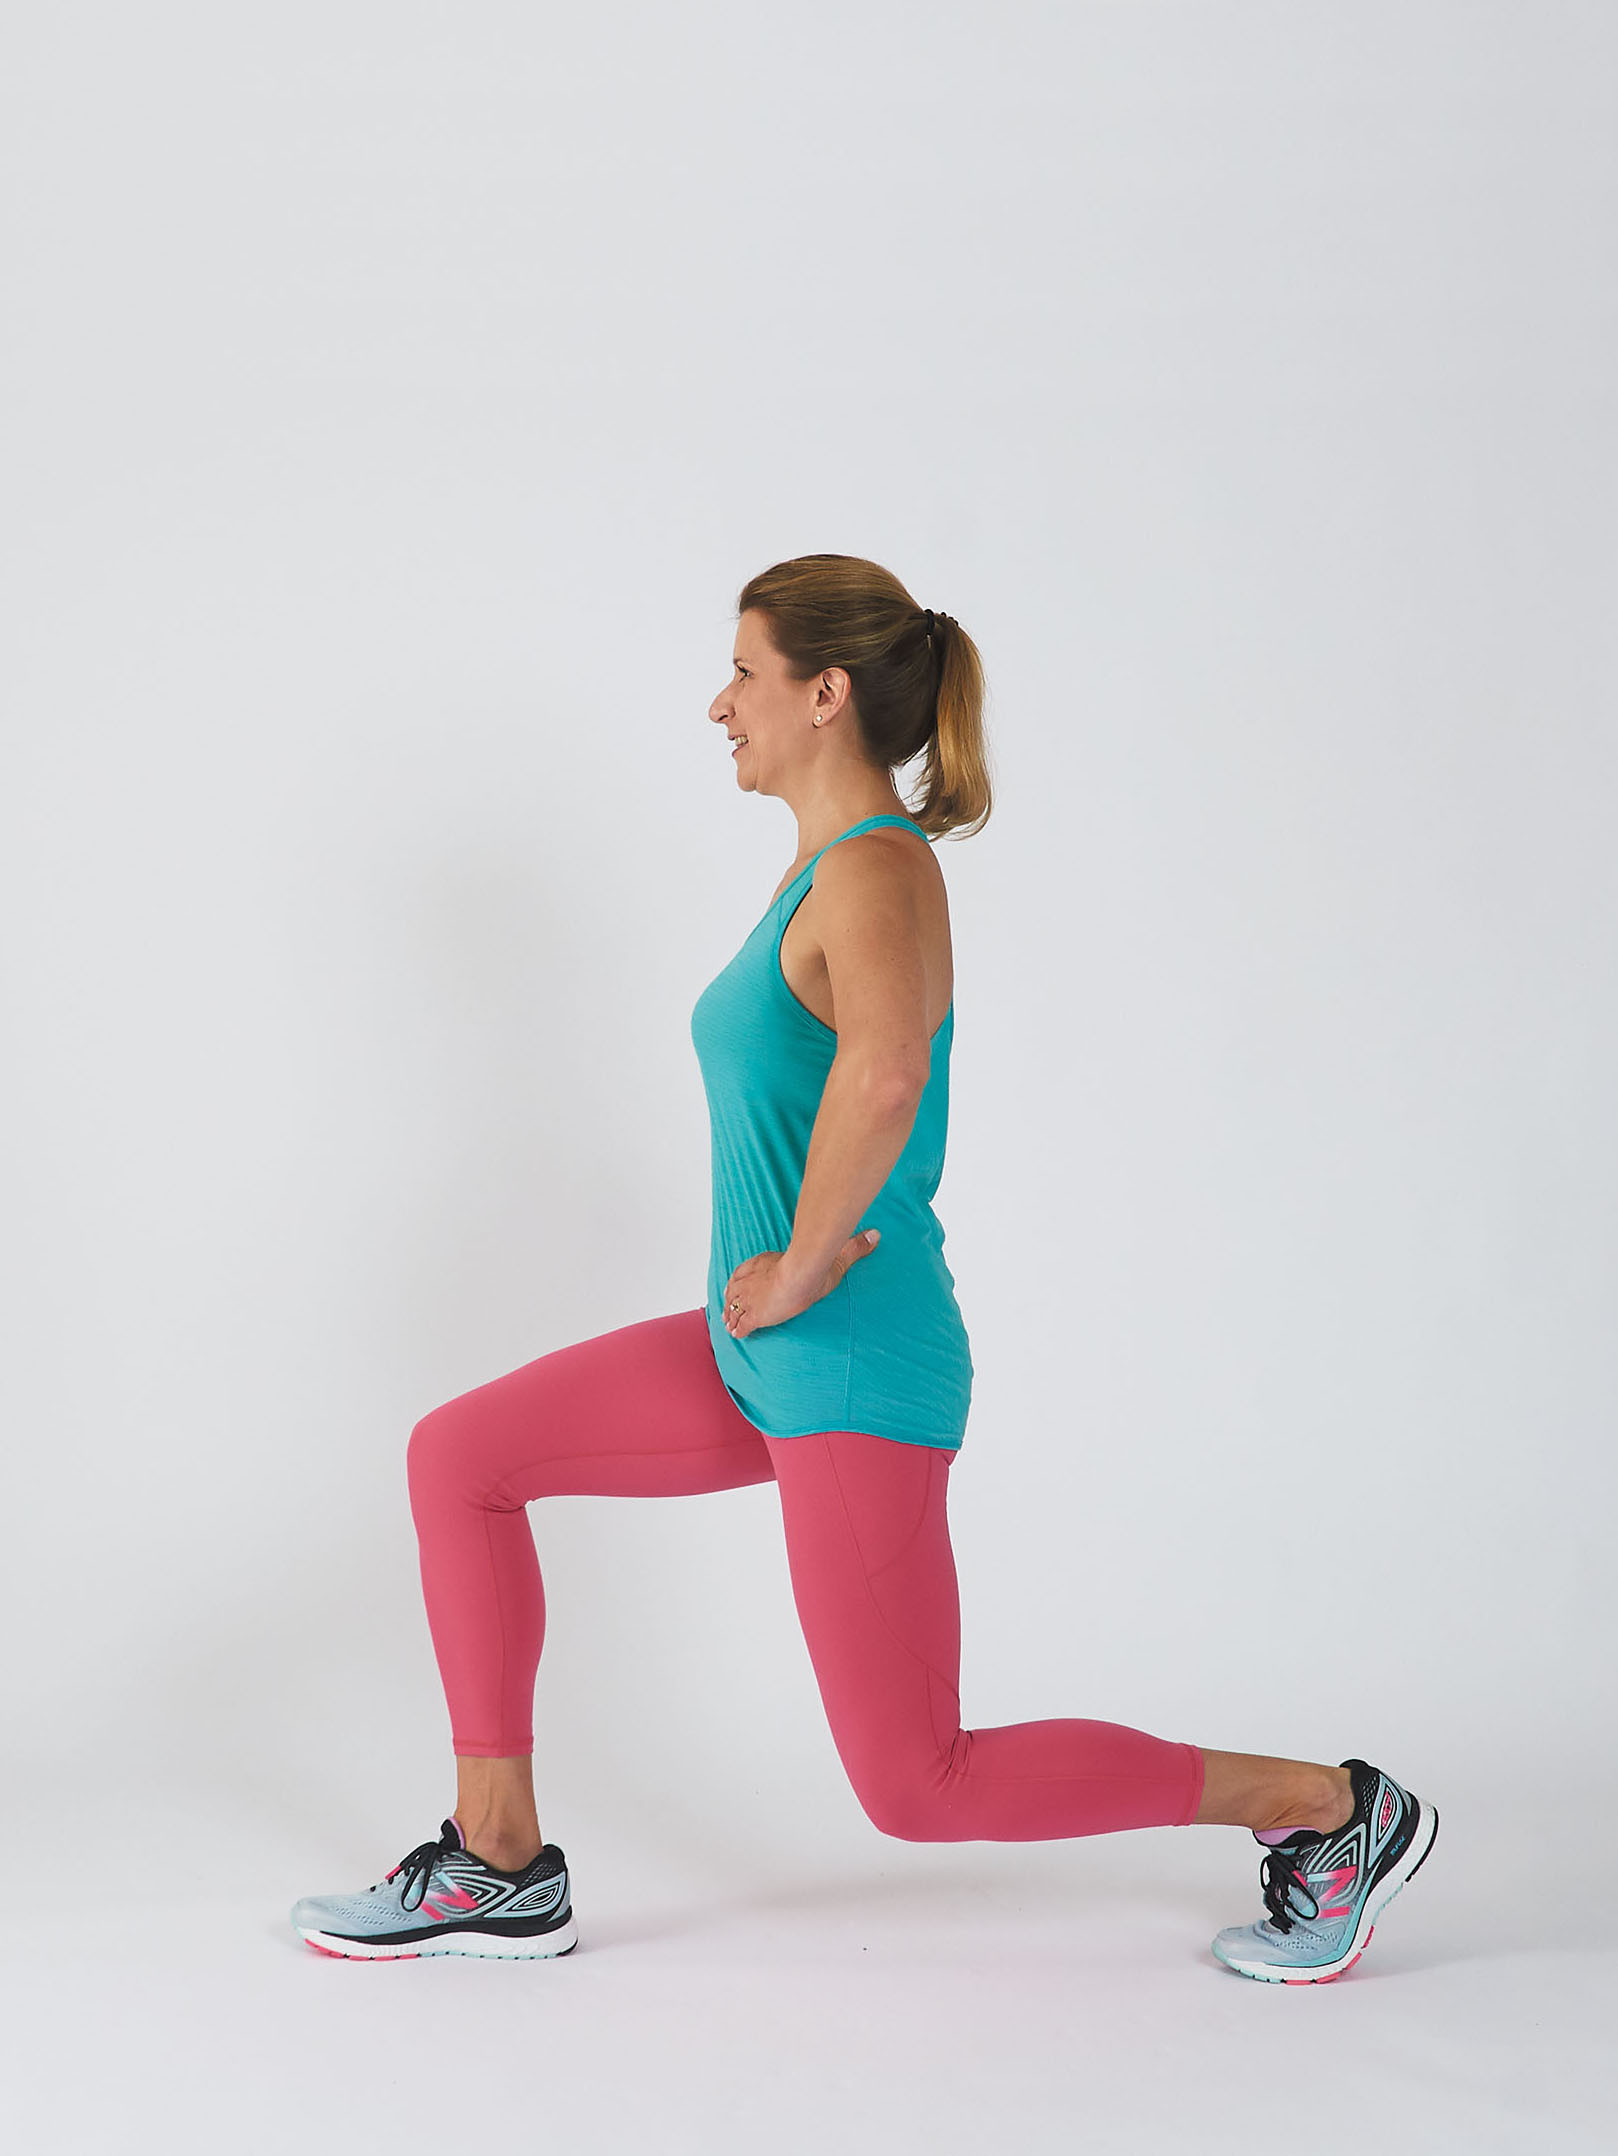
Motion: Bend your knees and lower your torso straight down until your right thigh is parallel to the ground. Hold, then return to starting position. Finish all reps, then step forward together with your left foot. This completes a set.
Tips and Techniques:
- Place your front knee directly over your ankle.
- In the lunge position, the shoulders, hips, and back knee must be aligned. Do not lean forward or backward.
- Keep your spine neutral and your shoulders down and back.